Knowledge Base
The AB Electronics UK Knowledge Base provides support solutions, tutorials and troubleshooting guides.

I2C Part 3 - I2C tools in Linux
An introduction to I²C tools in Linux
This tutorial is the third in a four-part series on the communication protocol I²C, explaining what it is, how it works and how you can use it on your Raspberry Pi.
For the other tutorials in this series, click on the links below.
-
Part 1: Introducing I²C
-
Part 2: Enabling I²C on the Raspberry Pi
-
Part 3: I²C tools in Linux
-
Part 4: Programming I²C with Python
The Raspberry Pi I2C buses
Each tool below takes a parameter for the ID of the target I2C bus on the Raspberry Pi. In each example, the ID 1 is used, for example, "sudo i2cdetect -y 1".
The original Raspberry Pi models A and B with a 26-pin GPIO header had a bus ID of 0 and used the following GPIO pins:
Pin 3 – I2C SDA (Data)
Pin 5 – I2C SCL (Clock)

The Raspberry Pi A+, B+, 2, 3, and later models with a 40-pin GPIO header use a default I2C bus on ID 1, which is accessible via the following GPIO pins:
Pin 3 – I2C SDA (Data)
Pin 5 – I2C SCL (Clock)
On the 40-pin GPIO header models, a secondary I2C bus is available for HAT EEPROM configuration data on pins:
Pin 27 - EEPROM SDA (Data)
Pin 28 – EEPROM SCL (Clock)

Installing I2C Tools
I2C Tools should be installed by default on current distributions of Raspbian Linux. To install I2C Tools on older distributions, enter the following in a terminal on your Raspberry Pi.
sudo apt-get update

sudo apt-get install i2c-tools
You can test if i2ctools works by listing all the I2C devices connected to your Raspberry Pi.
sudo i2cdetect -y 1
Available Commands in I2C Tools
Command Description
i2cdetect Detect I2C chips connected to the bus.
i2cdump Examine and read I2C registers on a connected device.
i2cget Read from I2C/SMBus chip registers on a connected device.
i2cset Set I2C registers on a connected device with new data or values.
i2ctransfer Send user-defined I2C messages in one transfer to a connected device.
i2cdetect
Synopsis
i2cdetect [-y] [-a] [-q|-r] i2cbus [first last]
i2cdetect -F i2cbus
i2cdetect -V
i2cdetect -l
Description
i2cdetect is a program to scan an I2C bus for connected devices. The output is a table listing the detected devices on the specified bus. The optional parameters first and last restrict the scanning range to the specified value. (default: from 0x03 to 0x77).
Options
-y Disable interactive mode and perform operation directly. This is useful in scripts or when detecting devices.
-F List the functionality of the adapter.
-V Show the version and exit.
-l Show a list of installed I2C buses.
Output
Each cell in the output table will contain one of the following symbols:
"UU" Probing of the address was skipped because the address is currently in use by a driver.
An address number in hexadecimal format.
"--" The address was probed, but no response from a chip.
Examples
The examples below can be used on your Raspberry Pi with i2cdetect.
List available I2C buses:
i2cdetect -l
List all detected devices on I2C bus 1 (default on Raspberry Pi) without user interaction.
i2cdetect -y 1
i2cdump
Synopsis
i2cdump [-f] [-r first-last] [-y] [-a] i2cbus address [mode [bank [bankreg]]]
i2cdump -V
Description
i2cdump is a helper program to read and examine registers on devices connected through the I2C bus.
Options
-y Disable interactive mode and perform operation directly. This is useful in scripts.
-f Force access to the device even if it is used by another application or driver. Using this flag can cause unexpected results and can confuse the kernel driver using the device.
-V Show the version and exit.
A minimum of two options must be provided with i2cdump. i2cbus is the number of the I2C bus to be scanned. Address selects the I2C device address to be scanned on the bus and is an integer between 0x03 and 0x77.
Warning
i2cdump can be dangerous if misused. Most notably, the c mode starts with WRITING a byte to the chip. Do not use i2cdump on random addresses.
Examples
The examples below can be used on your Raspberry Pi with i2cdump.
Dump the content of an I2C device at 7-bit address 0x68 on bus 1 using the default read byte mode with a user confirmation:
i2cdump 1 0x68
Dump the content of an I2C device at 7-bit address 0x68 on bus 1 using I2C block read transactions without user confirmation:
i2cdump -y 1 0x68 i
i2cget
Synopsis
i2cget [-f] [-y] [-a] i2cbus chip-address [data-address [mode]]
i2cget -V
Description
i2cget is a helper program to read registers on devices connected through the I2C bus.
Options
-y Disable interactive mode and perform operation directly. This is useful in scripts.
-f Force access to the device even if it is used by another application or driver. Using this flag can cause unexpected results and can confuse the kernel driver using the device.
-V Show the version and exit.
A minimum of two options must be provided with i2cget. i2cbus is the number of the I2C bus to be scanned. Address selects the I2C device address to be scanned on the bus and is an integer between 0x03 and 0x77.
The data-address parameter specifies the address on the chip to read from and is an integer between 0x00 and 0xFF.
The optional mode parameter is one of the letters b, w or c, corresponding to a read byte data, a read word data, or a write byte/read byte transaction.
Warning
i2cget can be dangerous if misused. Some chips can process an I2C read command as a write command and write incorrect data to a register.
Examples
The examples below can be used on your Raspberry Pi with i2cget.
Read the content of an I2C device at 7-bit address 0x68 on bus 1 from an 8-bit register at 0x20 after user confirmation:
i2cget 1 0x68 0x20
Read the content of an I2C device at 7-bit address 0x68 on bus 1 from a 16-bit register at 0x20 after user confirmation:
i2cget 1 0x68 0x20 w
i2cset
Synopsis
i2cset [-f] [-y] [-m mask] [-r] [-a] i2cbus chip-address data-address [value] [mode]
i2cset -V
Description
i2cset is a helper program to set registers on devices connected through the I2C bus.
Options
-y Disable interactive mode and perform operation directly. This is useful in scripts.
-f Force access to the device even if it is used by another application or driver. Using this flag can cause unexpected results and can confuse the kernel driver using the device.
-V Show the version and exit.
-m mask The mask parameter, if specified, describes which bits of value will be written to the data address. Bits set to 1 in the mask are taken from value, while bits set to 0 will be read from data-address and thus preserved by the operation.
-r Read the value back after writing and compare it with the value written.
A minimum of three options must be provided with i2cset. i2cbus is the number of the I2C bus to be scanned.
The data-address parameter selects the I2C device address to be scanned on the bus and is an integer between 0x03 and 0x77.
The data-address parameter specifies the address on the chip to read from and is an integer between 0x00 and 0xFF.
The value parameter, if specified, is the value to write to that location on the chip. If this parameter is omitted, then a short write is issued.
The optional mode parameter, if specified, is one of the letters b, w, s, or i, corresponding to a write size of a single byte, a 16-bit word, an SMBus block write, or an I2C block write.
For SMBus and I2C block writes, the write size is determined by the number of value parameters. Except for I2C block writes, a p can also be appended to the mode parameter to enable PEC. If the mode parameter is omitted, i2cset defaults to byte mode without PEC.
Warning
i2cset can be dangerous if misused. It can confuse your I2C bus, cause data loss, or have more severe side effects.
Examples
The examples below can be used on your Raspberry Pi with i2cset.
Write the value 0x50 to an 8-bit register 0x20 to a device on at 7-bit I2C address 0x68 on bus 1 after user confirmation:
i2cset 1 0x68 0x20 0x50
Write the value 0x5000 to a 16-bit register 0x20 to a device on at 7-bit I2C address 0x68 on bus 1 with no user confirmation:
i2cset -y 1 0x68 0x20 0x5000 w
i2ctransfer
Synopsis
i2ctransfer [-f] [-y] [-v] [-a] i2cbus desc [data] [desc [data]]
i2ctransfer -V
Description
i2ctransfer is a program to create I2C messages and send them combined as one transfer to devices connected through the I2C bus.
For read messages, the contents of the received buffers are printed to stdout, one line per read message.
Options
-y Disable interactive mode and perform operation directly. This is useful in scripts.
-f Force access to the device even if it is used by another application or driver. Using this flag can cause unexpected results and can confuse the kernel driver using the device.
-V Show the version and exit.
-v Enable verbose output. This will print information about all messages sent for reading and writing.
Arguments
The first parameter, i2cbus, contains the number of the I2C bus used. On a Raspberry Pi, this should be 1.
The following parameter is one or multiple desc blocks. The number of blocks is limited by the Linux Kernel and defined by I2C_RDWR_IOCTL_MAX_MSGS (42 as of v4.10).
The desc blocks are composed like this:
{r|w} [@address]
{r|w} specifies if the message is read or write
length_of_message specifies the number of bytes read or written in this message. It is parsed as an unsigned 16-bit integer.
[@address] specifies the 7-bit address of the chip to be accessed for this message and is an integer.
Warning
i2ctransfer can be dangerous if misused. Some chips can process an I2C read command as a write command and write incorrect data to a register.
Examples
The examples below can be used on your Raspberry Pi with i2ctransfer.
On bus 0, from an EEPROM at address 0x50, read 8 bytes from offset 0x64 (the first message writes one byte to set the memory pointer to 0x64, and the second message reads from the same chip):
i2ctransfer 0 w1@0x50 0x64 r8
All examples on this page are based on MAN pages from https://www.mankier.com/.
Related Expansion Boards
Related Expansion Boards
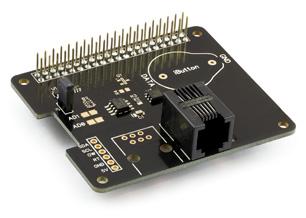
1 Wire interface for the Raspberry Pi
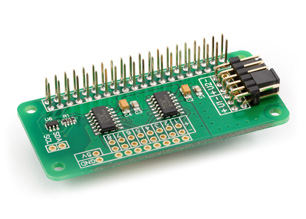
8 Channel 18-bit Differential Analogue to Digital converter for the Raspberry Pi
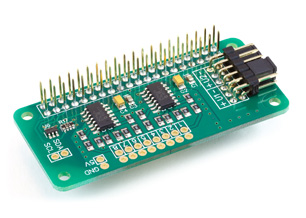
8 Channel 17-bit Single-Ended Analogue to Digital converter for the Raspberry Pi
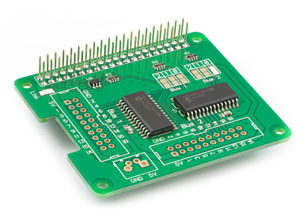
32 channel MCP23017 digital I/O expander for the Raspberry Pi

16-channel, 12-bit PWM controller for driving LEDs and RC servos
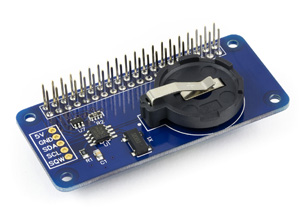
Real-time clock for the Raspberry Pi
Related Articles
How to use a static network IP Address on the Raspberry Pi
How to use a static network IP Address on the Raspberry Pi
Static Network IP Address Setup on the Raspberry Pi
Expanding the Potential of Your Raspberry Pi 400
