The AB Electronics UK Knowledge Base provides support solutions, tutorials and troubleshooting guides.

YOU WILL NEED THIS BOARD
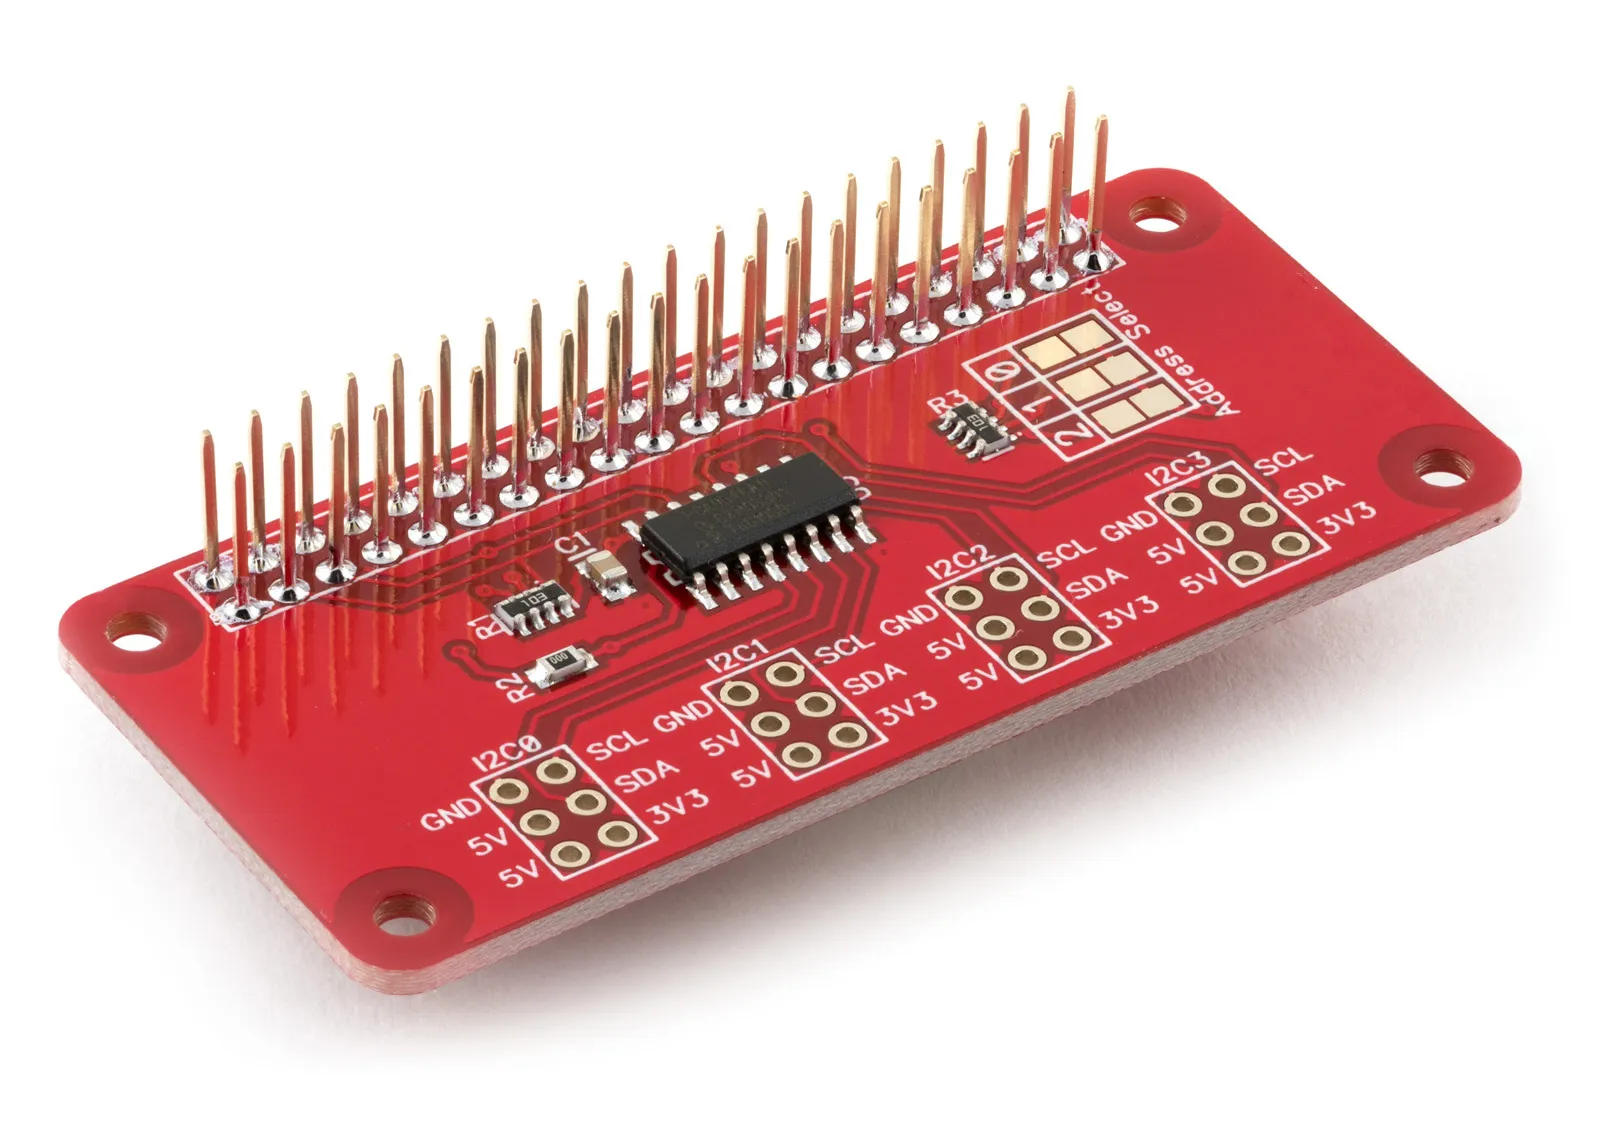
I2C Switch
4 Channel PCA9546 I2C Multiplexer for the Raspberry Pi and Single-Board Computers
£6.99 ex VAT
The I2C Switch can be used with the Raspberry Pi Pico available at Raspberry Pi
We have a MicroPython library to use with the Raspberry Pi Pico at GitHub at our MicroPython Libraries GitHub Repository
The example Python files can be found in /ABElectronics_MicroPython_Libraries/I2CSwitch/demos/
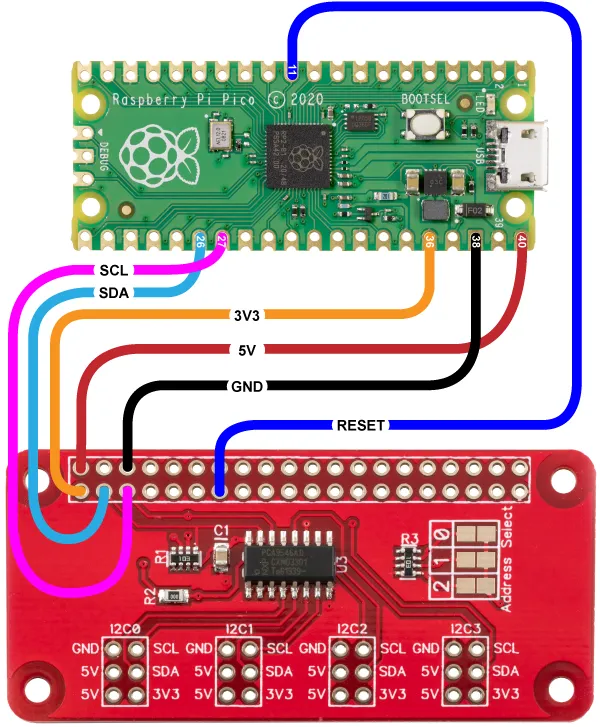
Connecting the I2C Switch to the Raspberry Pi Pico
The I2C Switch library uses the following pins on the Raspberry Pi Pico board.
| Pico Pin | Pico GPIO | Function | Pi Pin | Pi GPIO |
|---|---|---|---|---|
| 26 | 20 | I2C SDA | 3 | GPIO 2 |
| 27 | 21 | I2C SCL | 5 | GPIO 3 |
| 40 | VBUS | 5V | 2 | 5V Power |
| 38 | GND | GND | 6 | Ground |
| 36 | 3V3(OUT) | 3V3 | 1 | 3v3 Power |
Wiring Diagram:
Downloading and Installing the library
To download to your Raspberry Pi, type in the terminal:
git clone https://github.com/abelectronicsuk/ABElectronics_MicroPython_Libraries.git
To install the MicroPython Library, use the Thonny Python IDE.
Create a file for your chosen board and copy the contents of the Python file into that board's directory. For example, for the I2C Switch, create a new file in thonny called I2CSwitch.py and copy contents from I2CSwitch.py into the new file and save it onto the Raspberry Pi Pico board.
Create a second file where your main program will reside and import the board library at the program's top.
from I2CSwitch import I2CSwitch
Run with "Run Current Command" or F5 in Thonny.
Class: I2CSwitch
I2CSwitch(address, sda, scl)
The I2CSwitch class controls the I2C Switch outputs on the PCA9546A controller. Functions include setting and getting the I2C channel and resetting the switch.
Parameters:
address: Device i2c address. Supported I2C addresses are 0x70 to 0x77. defaults to 0x70
sda (optional): I2C SDA pin. If no value is set, the class will default to pin 20.
scl (optional): I2C SCL pin. If no value is set, the class will default to pin 21.
Initialise with the I2C address for the I2C Switch.
i2cswitch = I2CSwitch(0x70)
Functions:
switch_channel(channel)
Switch on the selected channel and switch off all other channels.
Parameters: channel - 1 to 4.
Returns: null
set_channel_state(channel, state)
Set the state for the selected channel. All other channels remain in their previous state.
Parameters:
channel - 1 to 4
state - True or False. True = channel on, False = channel off.
Returns: null
get_channel_state(channel)
Get the state for the selected channel.
Parameters: channel - 1 to 4
Returns: True or False. True = channel on, False = channel off.
reset()
Reset the PCA9546A I2C switch. Resetting allows the PCA9546A to recover from a situation in which one of the downstream I2C buses is stuck in a low state. All channels will be set to an off state.
Returns: null
Usage
To use the I2C Switch class in your code, you must first import the class:
from I2CSwitch import I2CSwitch
Next, you must initialise the I2CSwitch object:
i2cswitch = I2CSwitch(0x70)
Set the I2C switch to channel 2
i2cswitch.switch_channel(2)
Also useful for your Raspberry Pi project
Temperature & Sensing
1 Wire Pi Plus
Connect dozens of 1-Wire sensors - temperature, iButtons, EEPROMs - via a single GPIO pin. Stacks directly on the 40-pin header.
Analogue I/O
ADC Pi
Read up to 8 analogue inputs - perfect for pairing with your temperature sensors or other analogue-output devices.
All-in-one
Expander Pi
Combines ADC, DAC, 32 GPIO ports and a real-time clock on one board. The most versatile board for complex Raspberry Pi projects.
Chapters
Related Articles
Order these Boards
I2C Switch
4 Channel PCA9546 I2C Multiplexer for the Raspberry Pi and Single-Board Computers
£6.99 ex VAT