The AB Electronics UK Knowledge Base provides support solutions, tutorials and troubleshooting guides.

YOU WILL NEED THIS BOARD
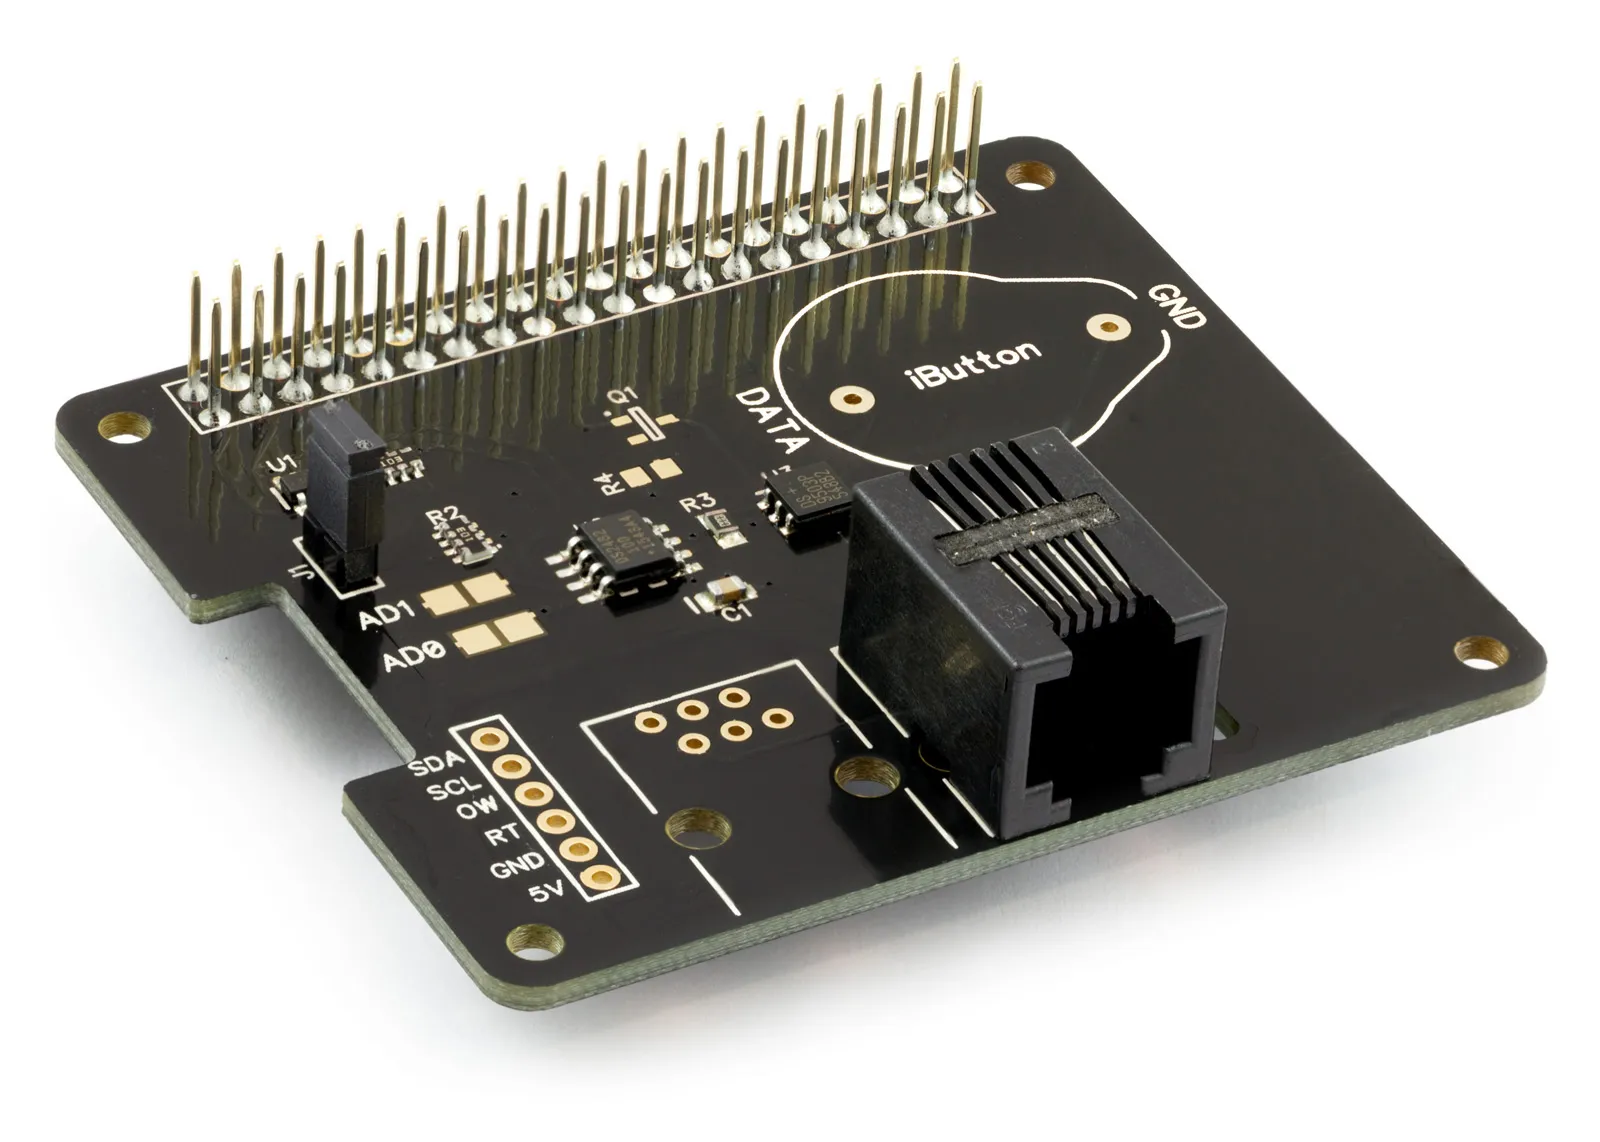
1 Wire Pi Plus
1 Wire interface development board for the Raspberry Pi and Single-Board Computers
£9.59 ex VAT
This tutorial will use the 1 Wire Pi Zero or 1 Wire Pi Plus with a maxim integrated DS18S20 digital thermometer. You will need your Raspberry Pi, a 1 Wire Pi Zero or 1 Wire Pi Plus, and a Maxim Integrated DS18S20 digital thermometer.
You must enable I2C on your Raspberry Pi; see our other tutorial on i2c: I2C Part 2 - Enabling I²C on the Raspberry Pi.
Next, install the OWFS (one wire file system) on your Raspberry Pi; see our other tutorial on owfs: OWFS with I2C support on Raspberry Pi.
You must reboot the Raspberry Pi once OWFS is installed before you can use the one-wire file system.
Now that all of the modules have been installed and the Raspberry Pi is configured to use I2C, we can begin building our project.
Parts Used:
1 Wire Pi Zero or 1 Wire Pi Plus
Maxim Integrated DS18S20 digital thermometer
Connecting wire
Connecting the Sensor to the 1 Wire Pi Plus
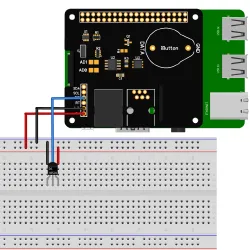 If you haven’t done so, install your 1 Wire Pi Plus onto the Raspberry Pi by connecting it to the GPIO header. Make sure your Raspberry Pi is turned off when you do this to minimise the risk of damaging the Raspberry Pi or the 1 Wire Pi Plus.
Next, connect the DS18S20 sensor to the 1 Wire Pi Plus. Pin 1 connects to GND, Pin 2 to OW on the 1 Wire Pi; Pin 3 connects to 5V.
For this tutorial, we will start by creating a shell script to read the temperature from the sensor. You can use your favourite text editor to write the program.
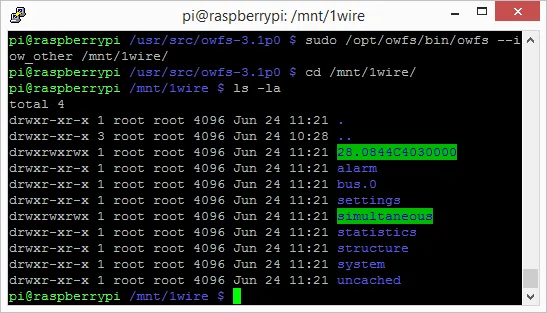
We need to create the mount point for the 1wire device with the following commands:
sudo mkdir /mnt/1wire
sudo owfs --i2c=ALL:ALL --allow_other /mnt/1wire/
Next, we need to list all connected 1wire devices:
cd /mnt/1wire/
ls -la
This will return a list of all the 1wire devices detected on the 1wire bus.
The DS18S20 sensors will appear in the list of devices with a number starting with 28. such as 28.0844C4030000, as shown below:
We can now query the sensor to obtain the temperature using the sensor's ID number. You must replace the 28.xxxxx number with the ID of your connected sensor.
head /mnt/1wire/28.0844C4030000/temperature
Next, we need to kill the owfs service and unmount the 1wire mount point
killall owfs
umount /mnt/1wire
We also need to add sleep commands to pause the script, allowing the OWFS file system to mount and unmount as the script runs.
Your script should now look like this.
mkdir /mnt/1wire
/opt/owfs/bin/owfs --i2c=ALL:ALL --allow_other /mnt/1wire/
sleep 1
head /mnt/1wire/28.5B7DC4030000/temperature
sleep 1
killall owfs
umount /mnt/1wire
Save your program as “read1wire.sh” and change the permissions on the script:
sudo chmod +x read1wire.sh
Run it in a command terminal as root using
sudo ./read1wire.sh
You will now have a temperature reading from your sensor on the console.
(images created with Fritzing)
Also useful for your Raspberry Pi project
Temperature & Sensing
1 Wire Pi Plus
Connect dozens of 1-Wire sensors - temperature, iButtons, EEPROMs - via a single GPIO pin. Stacks directly on the 40-pin header.
Analogue I/O
ADC Pi
Read up to 8 analogue inputs - perfect for pairing with your temperature sensors or other analogue-output devices.
All-in-one
Expander Pi
Combines ADC, DAC, 32 GPIO ports and a real-time clock on one board. The most versatile board for complex Raspberry Pi projects.
Related Articles
Order these Boards
1 Wire Pi Plus
1 Wire interface development board for the Raspberry Pi and Single-Board Computers
£9.59 ex VAT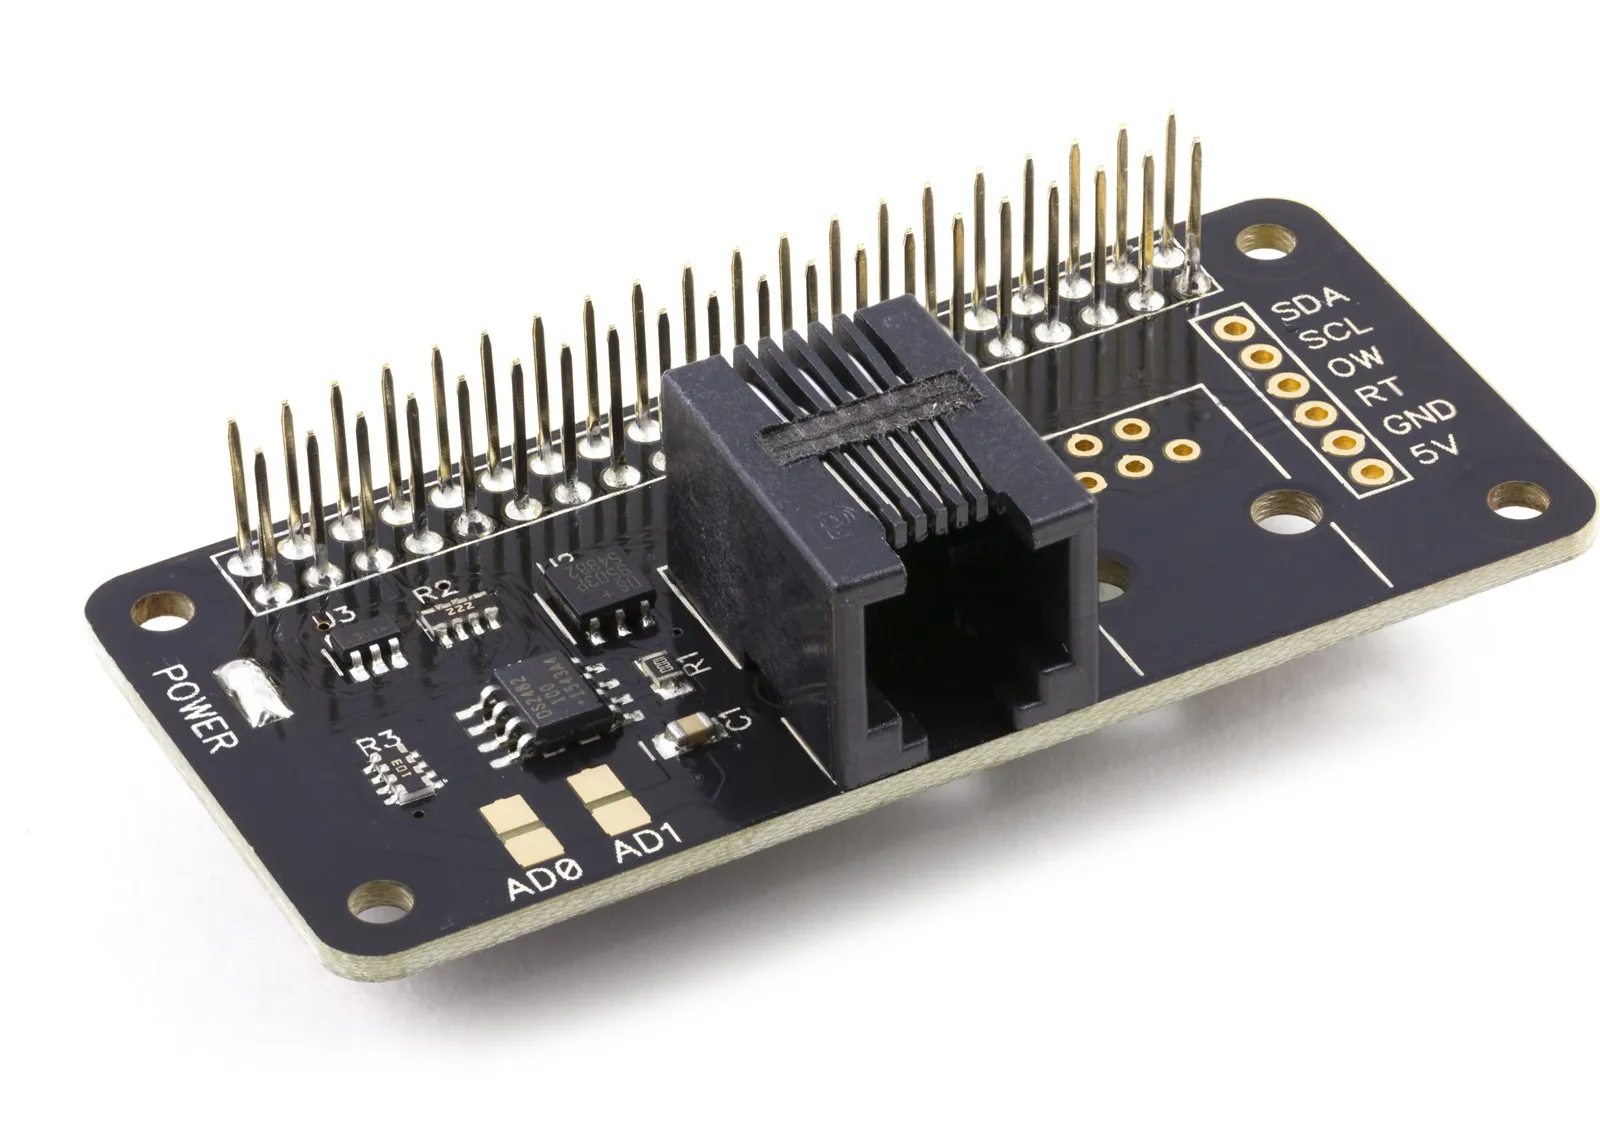
1 Wire Pi Zero
1 Wire interface development board for the Raspberry Pi Zero and Single-Board Computers
£9.19 ex VAT