The AB Electronics UK Knowledge Base provides support solutions, tutorials and troubleshooting guides.

YOU WILL NEED THIS BOARD
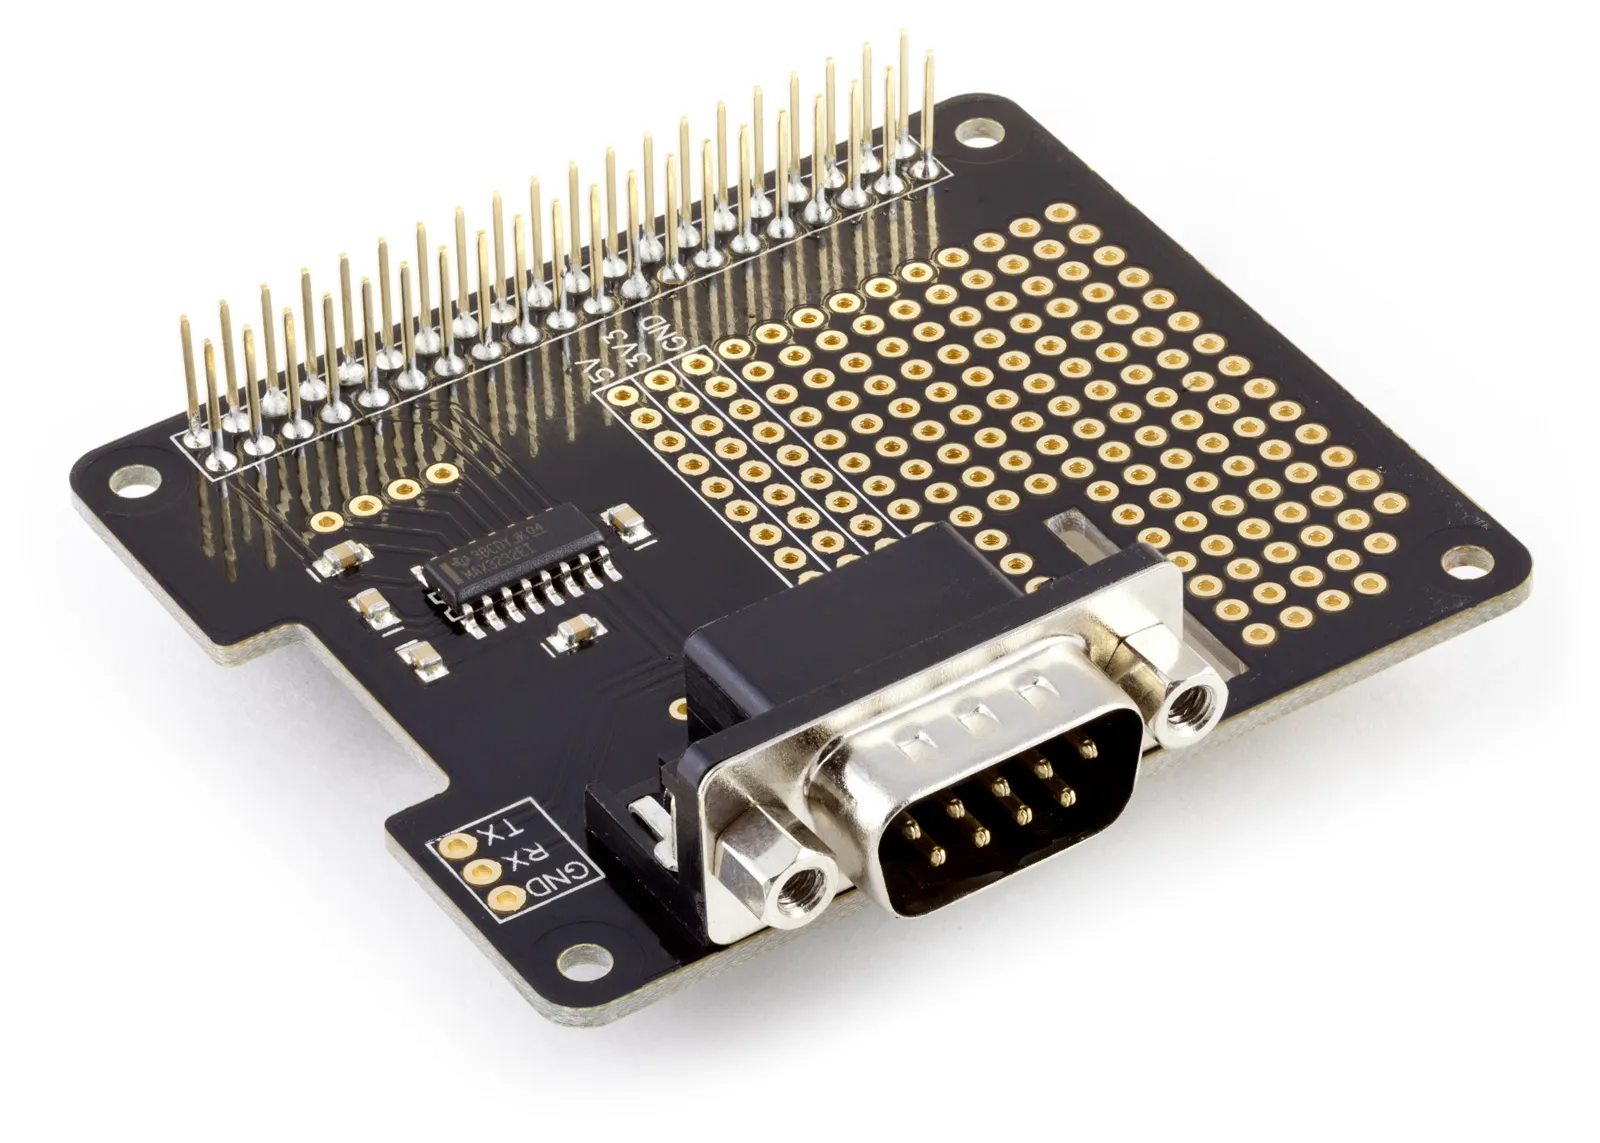
Serial Pi Plus
RS232 Serial Port development board for the Raspberry Pi and Single-Board Computers
£10.99 ex VAT
The Universal Asynchronous Receiver/Transmitter (UART) port on a Raspberry Pi is an important feature for connecting and communicating with other devices. It allows the Raspberry Pi to send and receive data to and from devices like microcontrollers, GPS modules, or sensors using a simple, serial communication method. The UART port uses two wires: TX (transmit) for sending data and RX (receive) for receiving data.
This type of communication is often used for tasks like debugging, setting up devices, or connecting to a serial console, which is a way to interact with your Raspberry Pi using text commands. The Raspberry Pi has special GPIO (General Purpose Input/Output) pins that include UART pins, making it easy to connect to other serial devices. This simplicity makes UART a useful tool for expanding what you can do with your Raspberry Pi projects, even if you’re new to computers and electronics.
The Raspberry Pi contains a UART serial port on the GPIO header on pins 8, TXD (GPIO 14) and 10, RXD (GPIO 15). The UART port can connect directly to a wide range of devices using 3.3V UART pins or a serial interface to convert the UART voltages to an industry standard such as RS232 or RS485.
What is RS232
RS232 is a widely used standard for serial communication between devices, such as computers and peripherals. It operates by sending data in a continuous stream of bits over a single cable, which simplifies connections between devices like printers, modems, and older computer systems. RS232 uses simple voltage levels to represent binary data, typically with +12V or -12V signalling a ‘1’ bit and 0V signalling a ‘0’ bit. This straightforward approach allows devices to reliably exchange data over short distances, making RS232 a fundamental interface in many electronics setups, particularly in older technologies and certain industrial applications.
You can connect RS232 devices to the Raspberry Pi using our Serial Pi Plus or Serial Pi Zero communication boards.
What is RS485
RS485 is a standard for serial communication that enables devices to exchange data over longer distances and in electrically noisy environments. Unlike RS232, RS485 uses differential signalling, where data is transmitted on two wires: one carrying a positive voltage and the other carrying an equal negative voltage, which helps to reduce interference and improve reliability. This makes RS485 suitable for applications like industrial automation, where devices may be spread over large areas and need robust communication. It supports multi-drop connections, allowing multiple devices to communicate on the same bus, and can achieve higher data rates than RS232. RS485 is commonly used in scenarios requiring dependable data transmission over extended distances, offering versatility and resilience in various electronics and control systems.
You can connect RS485 devices to the Raspberry Pi using our RS485 Pi communication board.
UART on the Raspberry Pi
The illustration below shows the pin numbers for the gpio pins on the Raspberry Pi GPIO header.

The UART port on the Raspberry Pi operates at 3.3V. When connecting a device to the UART serial port, always ensure your uses the correct voltage, 3.3V. Connecting a 5V device to the UART port can damage the Raspberry Pi GPIO header.
Using the UART serial port
The UART port can be enabled using the raspi-config utility.
Step 1 - Install Raspberry Pi OS onto an SD card and boot the Raspberry Pi.
Login via terminal or desktop and shell.
Configure the system with the following:
sudo raspi-config
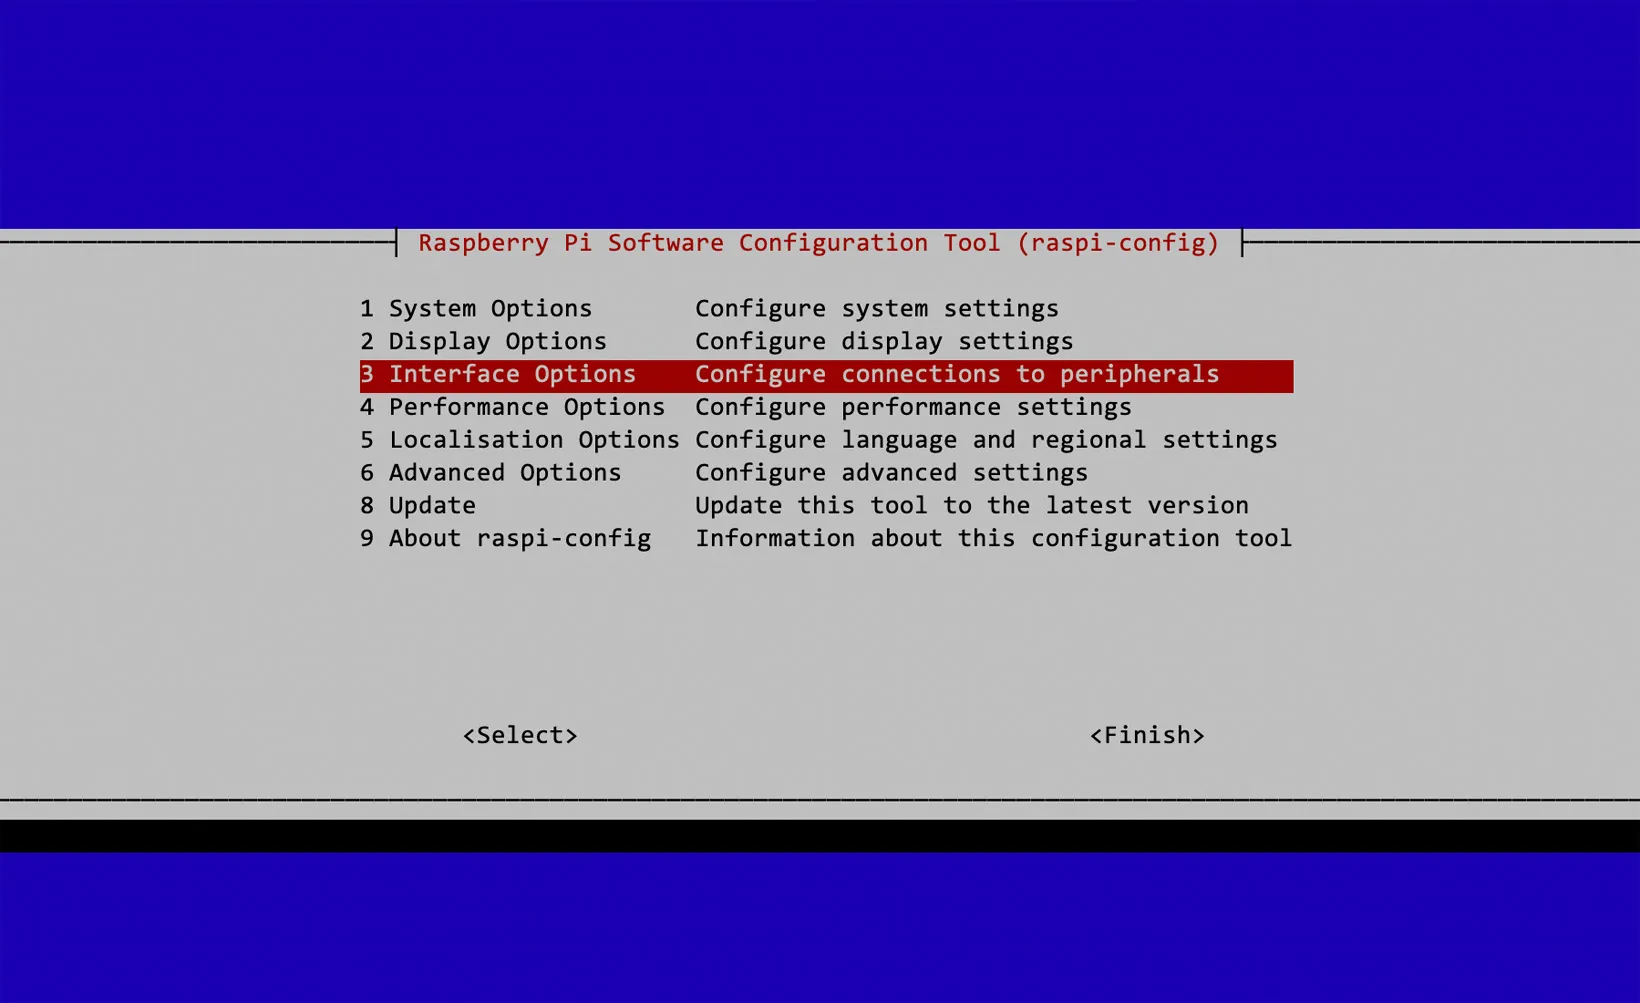
Step 2 - Select “3 Interface Options”
Step 3 - Select “I6 Serial Port”

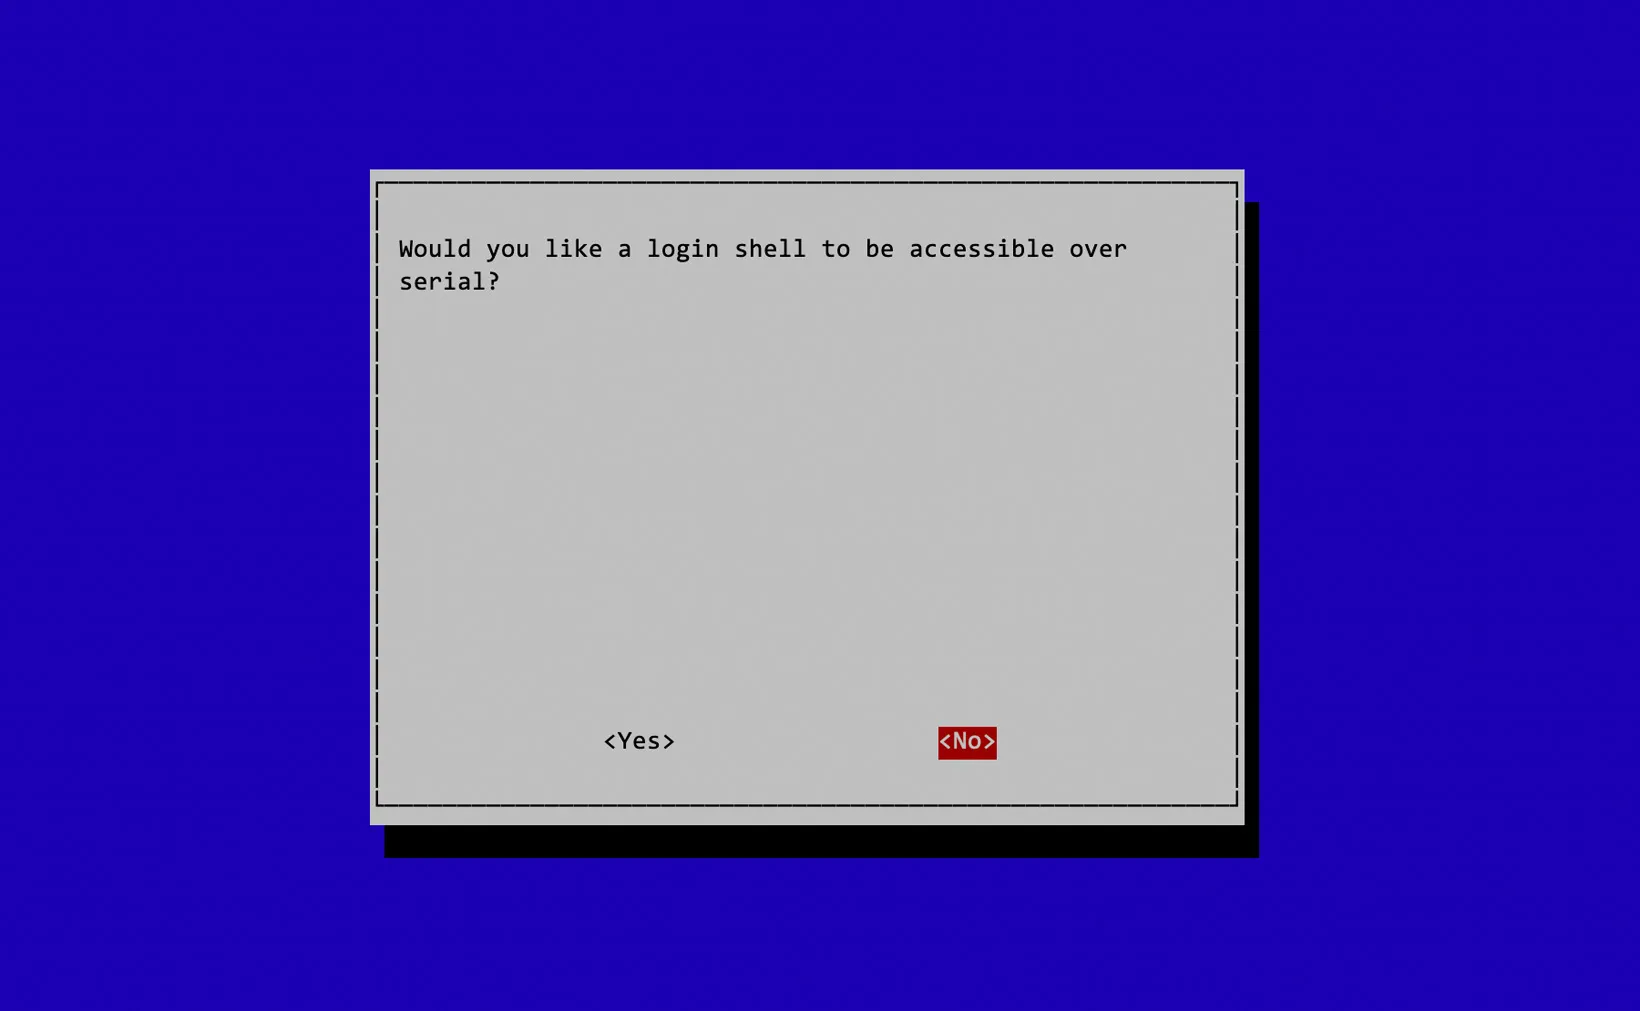
Step 4 - A screen will ask if you want a login shell accessible over serial. Select Yes to control the Raspberry Pi through a serial port terminal. Select No if you use the serial port to control other devices.
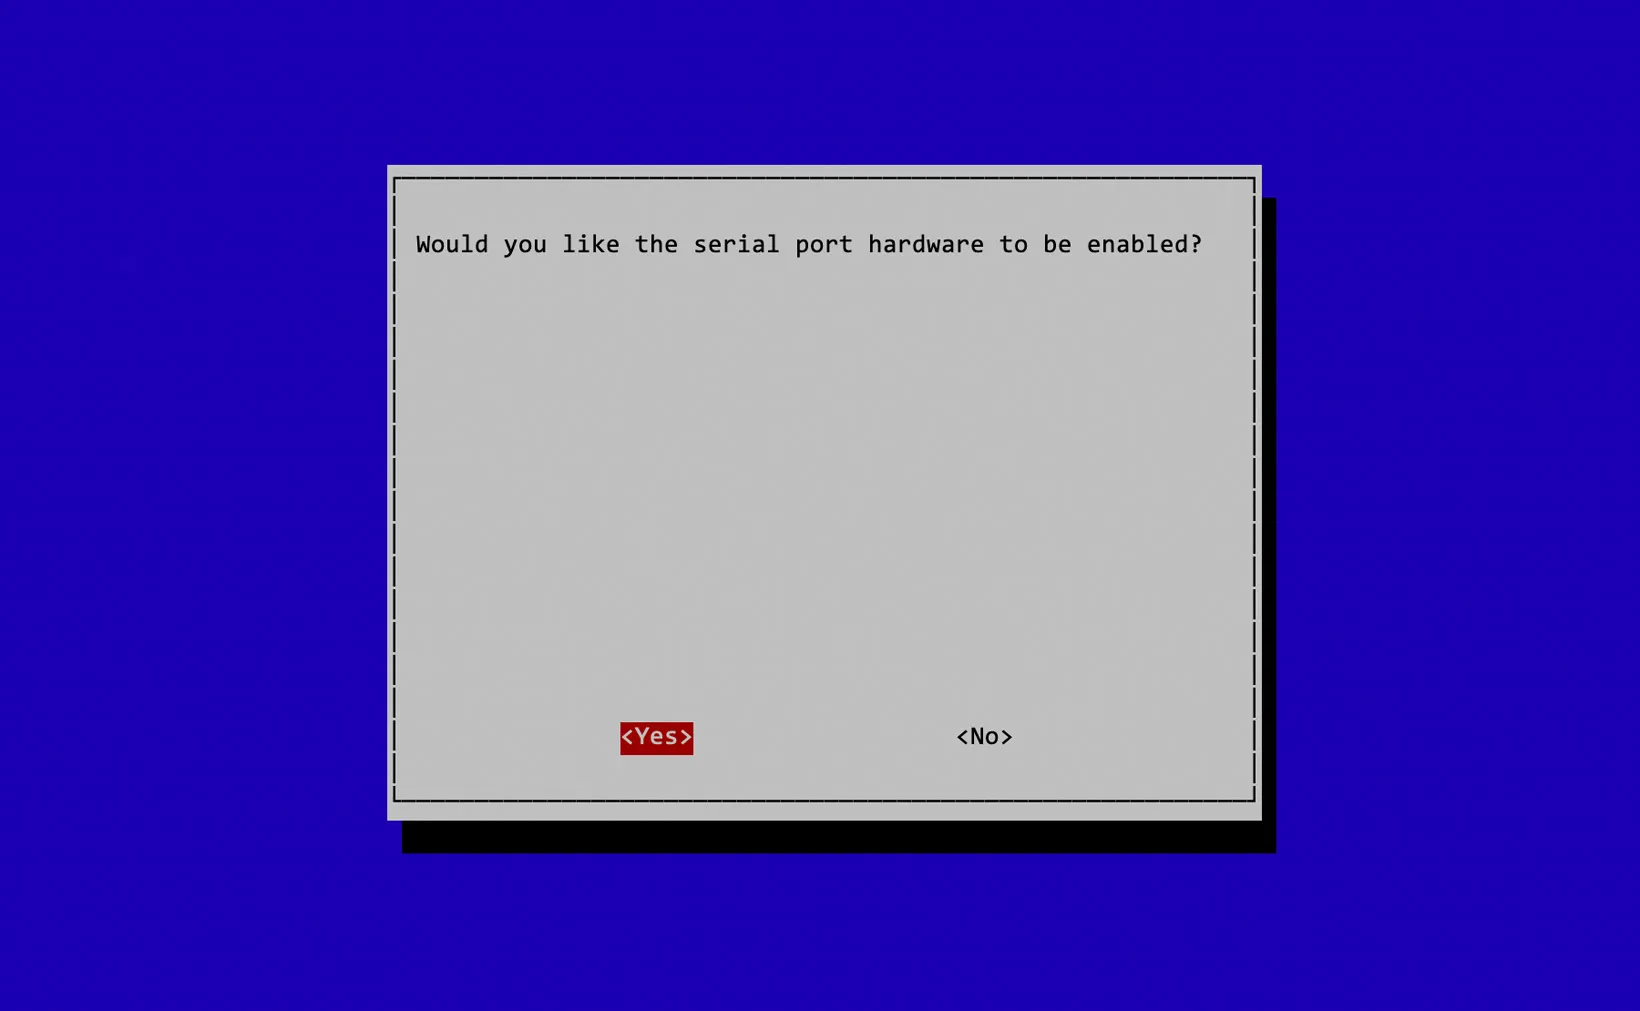
Step 5 - When asked if you would like the serial port hardware to be enabled, select Yes.
Step 6 - A confirmation screen should appear, showing the serial port has been enabled.
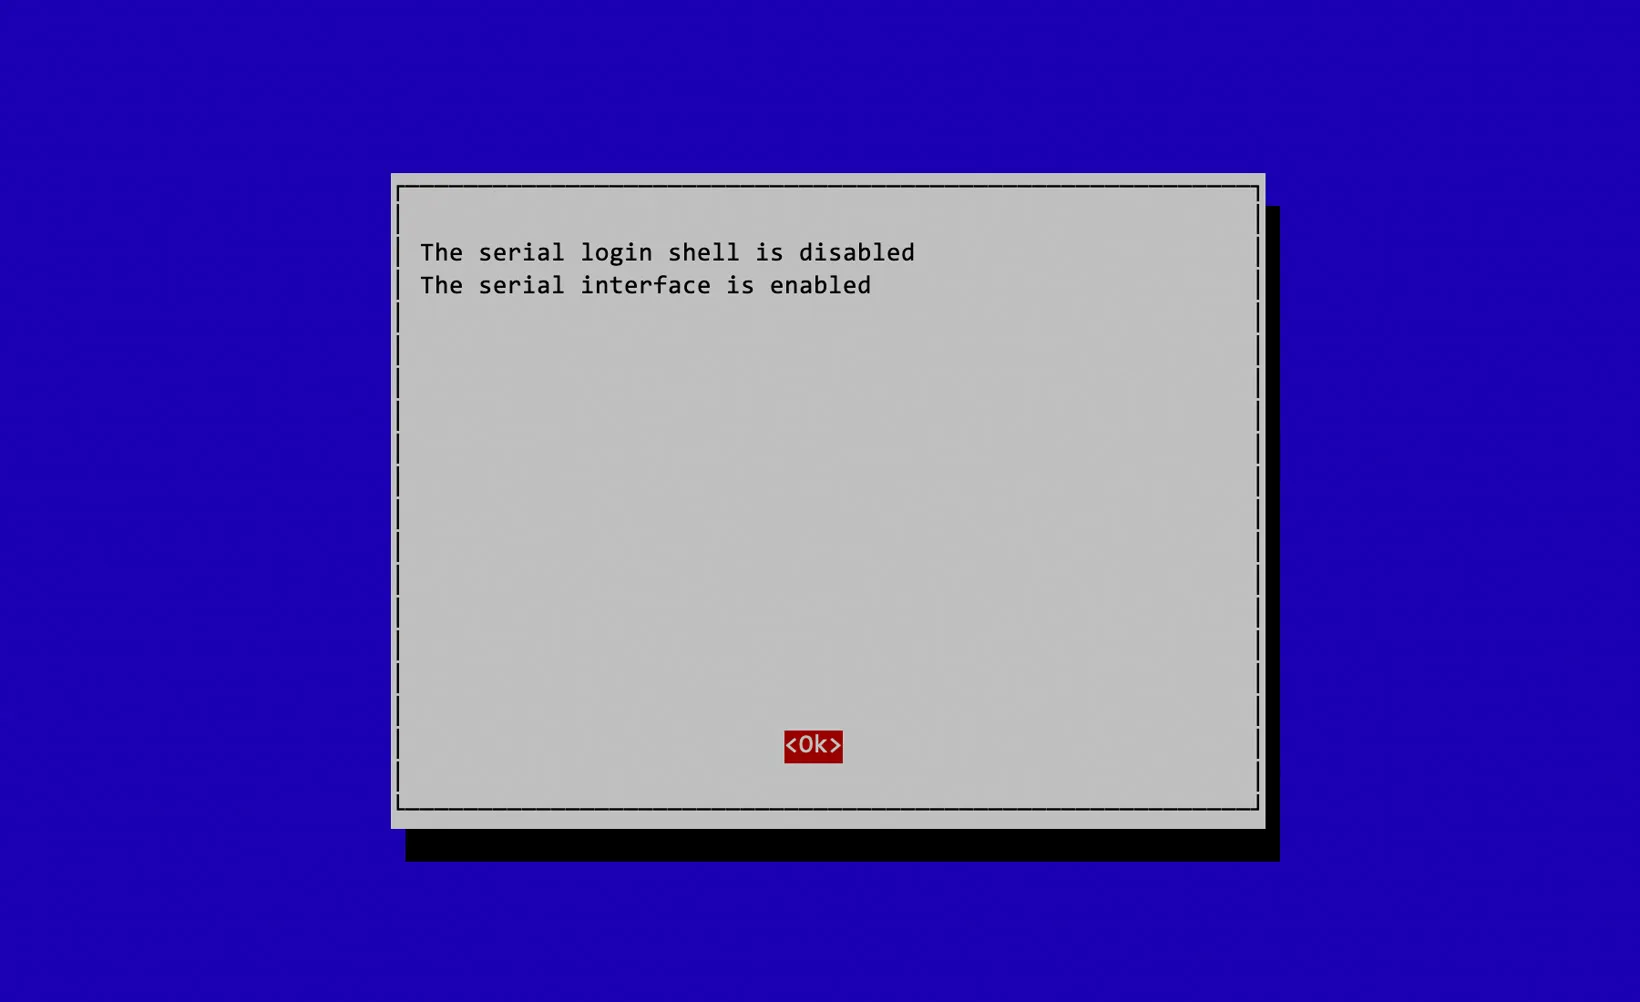
Step 7 - On the main raspi-config screen, select finish and reboot your Raspberry Pi. The UART serial port should now be enabled.
Disabling the Serial Login Shell (alternative method)
You can use the following steps to disable the serial login shell without using raspi-config.
Step 1: To disable the serial login shell, edit the /boot/cmdline.txt file.
sudo nano /boot/cmdline.txt
Step 2: Find the following text and remove it:
console=serial0,115200
Step 3: Exit the editor, save your changes, and then:
sudo reboot
With the serial login shell disabled, you can now access the UART serial port at /dev/ttyS0.
Notes for the Raspberry Pi 3 Model B, B+, 4 and Raspberry Pi Zero W:
The Raspberry Pi 3 Model B, B+, 4 and Raspberry Pi Zero W contain two UART controllers which can be used for serial communication, the mini UART and PL011 UART. By default, the mini UART is mapped to the TXD (GPIO 14) and RXD (GPIO 15) on the 40-pin GPIO header and the PL011 UART is used for the Bluetooth/Wireless module, but either module can be mapped to the GPIO port.
The mini UART port can be accessed using the /dev/ttyS0 device in Linux. One issue with the mini UART controller is that its baud rate is linked to the VPU core frequency, so as the VPU frequency changes depending on processor load, so does the baud rate of the UART controller. This will cause problems as serial devices expect a constant baud rate during communication.
To fix this issue, the VPU core frequency must be fixed, which can either limit the speed of the Raspberry Pi or increase power consumption and heat generated, depending on the speed at which the core frequency is set.
The mini UART controller has a smaller FIFO buffer than the PL011 UART controller. This can cause problems at higher baud rates, making losing characters more likely.
The PL011 UART controller is not linked to the VPU core frequency. This means that the baud rate stays the same regardless of VPU speed. The PL011 UART controller also includes other features not present in the mini UART controller, such as framing error detection, break detection, receive timeout interrupts and parity bit support.
The main disadvantage of using the PL011 UART controller is that it disables the Bluetooth/Wireless module, so you cannot use the Bluetooth features of the Raspberry Pi 3 and Zero W.
We recommend using the PL011 UART controller when a reliable data connection, power consumption, and processor speed are priorities.
If you need to use the Bluetooth module on the Raspberry Pi, use the mini UART controller.
Using the PL011 UART port
For Raspberry Pi OS and Raspbian Linux, there is a device tree file called disable-bt, which makes the Raspberry Pi disable the Bluetooth module and map pl011 UART on pins 14 and 15.
Step 1 - Login via terminal or desktop and shell
Step 2: Device Tree settings as below:
Add the device tree to /boot/firmware/config.txt to disable the Bluetooth module. Note: Older versions of Raspberry Pi OS use the path /boot/config.txt.
sudo nano /boot/firmware/config.txt
Add at the end of the file
dtoverlay=disable-bt
Exit the editor.
Step 3: You must also disable the hciuart service, which initialises the Bluetooth modem:
sudo systemctl disable hciuart
Step 4: Reboot your Raspberry Pi to enable the changes:
sudo reboot
You can check if the serial port works by following our Serial Port Loopback Test tutorial steps.
For programming the serial port on a Raspberry Pi, we recommend the pySerial Python library.
Also useful for your Raspberry Pi project
Temperature & Sensing
1 Wire Pi Plus
Connect dozens of 1-Wire sensors - temperature, iButtons, EEPROMs - via a single GPIO pin. Stacks directly on the 40-pin header.
Analogue I/O
ADC Pi
Read up to 8 analogue inputs - perfect for pairing with your temperature sensors or other analogue-output devices.
All-in-one
Expander Pi
Combines ADC, DAC, 32 GPIO ports and a real-time clock on one board. The most versatile board for complex Raspberry Pi projects.
Chapters
Related Articles
Order these Boards
Serial Pi Plus
RS232 Serial Port development board for the Raspberry Pi and Single-Board Computers
£10.99 ex VAT
Serial Pi Zero
RS232 serial interface for the Raspberry Pi Zero and Single-Board Computers
£9.49 ex VAT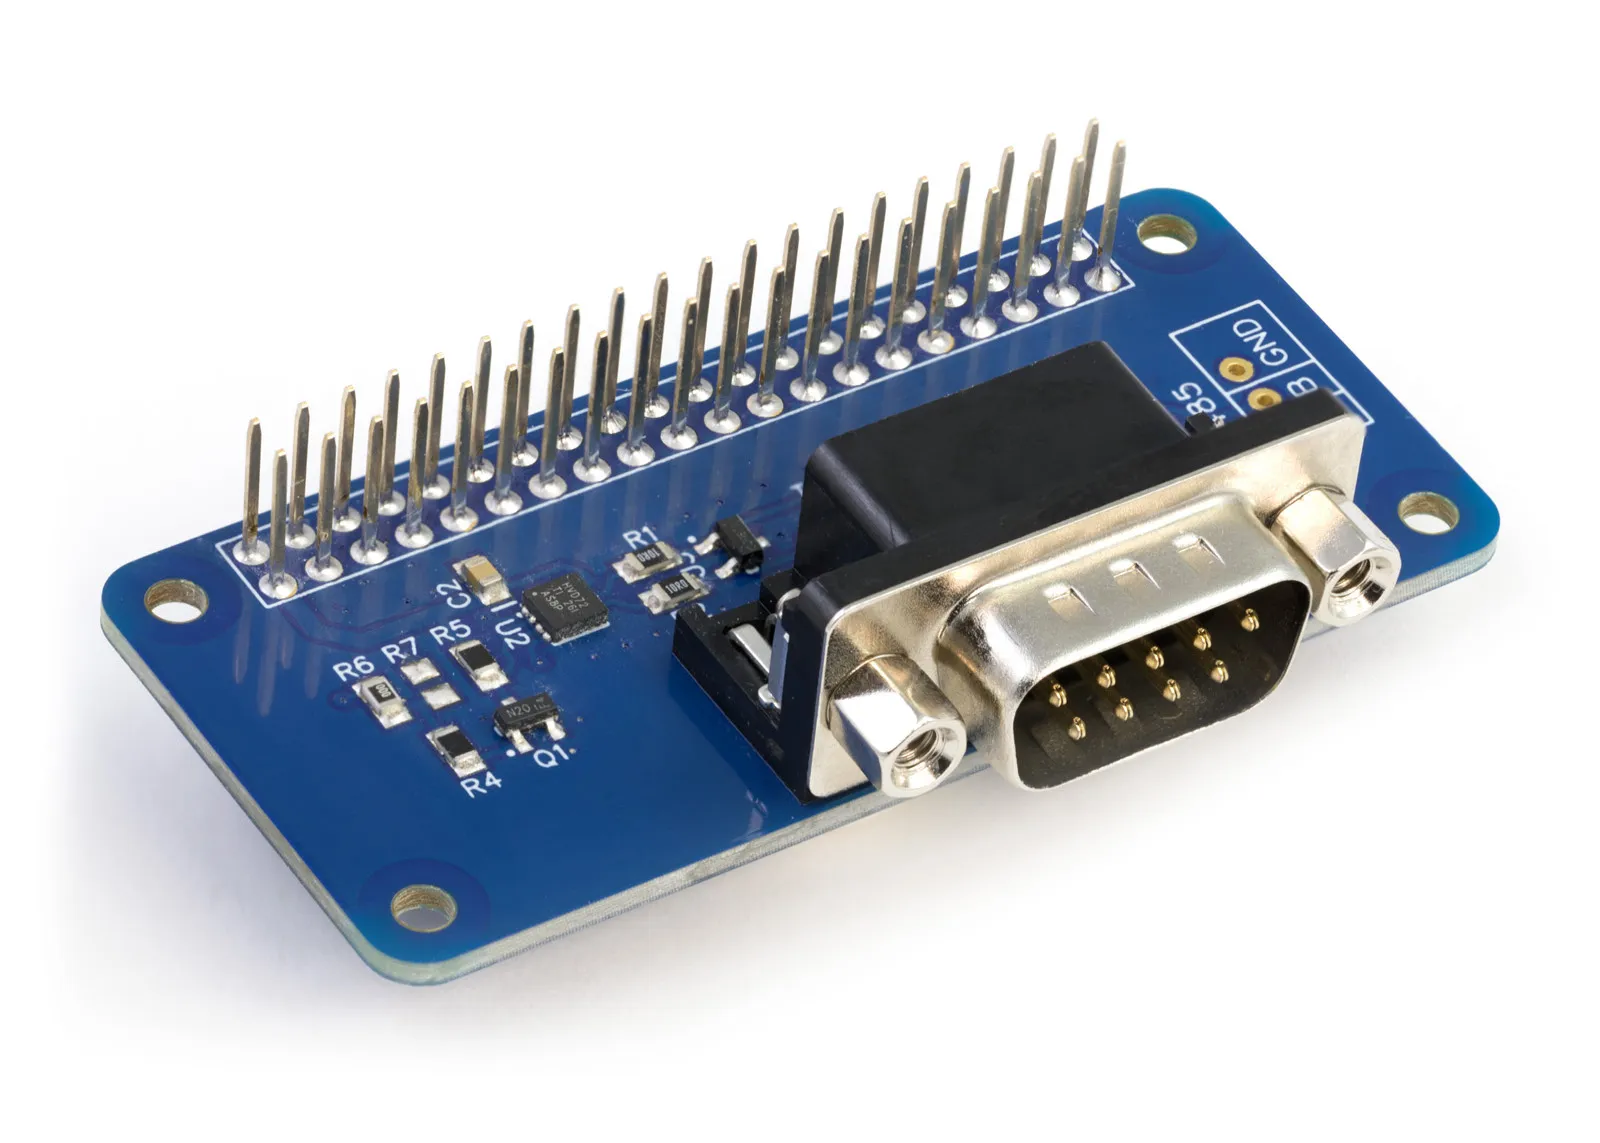
RS485 Pi
RS485 serial interface development board for the Raspberry Pi and Single-Board Computers
£11.99 ex VAT